Well, this Christmas Santa brought the 3 boys in the family an electronic toy each, An Amazon Fire. They were very excited and now that I have figured that I can blog on it I too am very excited!
I am just thinking of all the wonderful projects that I can share with items from the new catalogue, and don't forget those Saleabration goodies!
Now I just need to figure how to add pics....
Hope you had a lovely Christmas.
Happy Crafting
Sarah
Tuesday, 29 December 2015
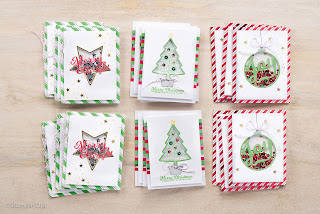
Wednesday, 23 December 2015
End of Year Sale Update

Fantastic news more items have been added to the End of Year Sale; some wonderful bargains to be had.
But don't wait to order as things will sell out fast.
Any queries...just contact me. The easiest way to shop - just click on the link to Shop on my page!
Happy Crafting
Sarah
Saturday, 19 December 2015
Crafting Workshop Today

Had lots of fun crafting today at The Little Shop of Crafts& Gifts.
There was a Christmas theme going on, but one of the ladies preferred to make some non-Christmas items and that was fine. Think the butterfly looks really cute!
Think that everyone enjoyed it - was lots of chatting and laughing and time just flew by.
I am hoping to do more workshops next year so let me know if you are interested, a great way to spend a few hours crafting with others.
Happy Crafting
Sarah
Wednesday, 16 December 2015
Christmas Crafting Class

We all have those last minute things we need to finish, maybe a Christmas card, some tags or even some boxes/bags to make, and what about those sometimes neglected Thank you cards?
I am hosting a Christmas Crafting event on Sunday 19th Dec 1.30 -3.30pm at the Little Shop of Crafts & Gifts; Reading.
If you would like to come please contact me or the shop directly. Cost of £12 and includes all you need to make some exciting Christmas goodies and even better they can be adapted for other occasions if you prefer.
Happy Crafting
Sarah
Little Shop of Crafts & Gifts

Wednesday, 9 December 2015
Lego card, great for kids as well as Lego addicts.
My son needed a card for a party, but of course being him, he told me the morning of the day it was needed. Now I do have lots of stamps that are great for kids but lots of them are for the younger ones.
So I decided to have a go at a Lego card. Simple I thought, and in fact for once, I was right.

All you needed was a few dots (in Lego language these are actually called studs) and rectangles of different colours.

Some sponging around the studs and rectangles with the studs adhered with dimensionals.

I then added these to a card base with a mat; as the top picture shows I went a bit off the mat to add some dimension. I also realised after the photo that the mat wasn't stuck down very well and I did rectify that before the card was gifted.
The only hard bit was figuring out the size of the rectangle needed for the number of studs. After a bit of internet browsing I did find a table and used that. It is from Operation Write Home.
Here are the dimensions needed for a 1/2" circle punch; obviously the bigger the circle the bigger the card piece that will need to be.
"

There are so many combinations and with a simple sentiment added a really simple card to make.
Happy Crafting
Sarah
Wednesday, 2 December 2015
Making a box is simple, really!
I always thought that making pretty boxes was out of my league, but when I started papercrafting, with the help of the internet of course, I learnt that making boxes is actually really simple.
I've tried to write the instructions below, but as you know that is not my forte, but hopefully it makes some sense.


I used a belly band and a decoration from the left over paper.

Here is how I worked out the size paper I need; started with the base (8x2) added 1" sides on the top of this and bottom, then I knew I needed a top of 8 x 2 so added that as well and then added the lip of a further inch. I then wanted my box to have sides, and knew it would be 1" to match the other sides, so added 1" to each side.....hope this makes some sense, if not just let me know!
So the final piece of paper had to be from the bottom 1+2+1+2+1= 7" and from the side 1+8+1 =10
By working out the box size in its components, it makes it really easy to figure where to score!

Short side (8") score at 1", 3", 4", 6"
How did I get that you might wonder?
Well, from the top to bottom we know the side is 1" (so first score) base is 2" above that so score at 3" (1 +2) and then another side so +1" = score at 4"; then another 2" for the top of box, making it
4+2 = score at 6" and the left over 1" makes the lip of the lid.
Hope this makes some sense and you can work our how I used my working on where to score.
Long side (10"), score at 1" and 9"

The orange triangles you show you where to but - along each of the sides to the first score mark on the long side; ie 1" cuts. I have shown the to be triangles as it makes it much easier to get a nicer finish and you don't have as much paper to make the box bulky.


You want to make sure that the outside of the box is lying against your desk and then add glue to each of the tabs- do make sure you fold the tabs in, otherwise you'll be gluing them on the outside of the box and that wouldn't look too good.

I tried to colour coordinate where to affix the tabs too, but got a bit muddles on the bottom left (looking at the picture) - those marks should have been on the side panel NOT the box.
Anyway hope it makes some sense, you need to attach two tabs to the bottom sides and 1 to the top to make the lid.

I really really hope this makes some sense and apologise for the photo quality, seems that our main camera isn't working and the one I used obviously isn't up to the job!
Making a box, will hopefully now be easier and if you know how to work out the components of the box, you should be able to make boxes of varying sizes - but if you do get stuck please get in touch and I can hopefully sort it out for you!
Cheers
Sarah
I've tried to write the instructions below, but as you know that is not my forte, but hopefully it makes some sense.
This is the final product. pretty I think and great to small Christmas gifts.


I used a belly band and a decoration from the left over paper.
The box size I wanted was 8" x "2 x 1"

Here is how I worked out the size paper I need; started with the base (8x2) added 1" sides on the top of this and bottom, then I knew I needed a top of 8 x 2 so added that as well and then added the lip of a further inch. I then wanted my box to have sides, and knew it would be 1" to match the other sides, so added 1" to each side.....hope this makes some sense, if not just let me know!
So the final piece of paper had to be from the bottom 1+2+1+2+1= 7" and from the side 1+8+1 =10
Paper size therefore 7" x 10"
By working out the box size in its components, it makes it really easy to figure where to score!

Short side (8") score at 1", 3", 4", 6"
How did I get that you might wonder?
Well, from the top to bottom we know the side is 1" (so first score) base is 2" above that so score at 3" (1 +2) and then another side so +1" = score at 4"; then another 2" for the top of box, making it
4+2 = score at 6" and the left over 1" makes the lip of the lid.
Hope this makes some sense and you can work our how I used my working on where to score.
Long side (10"), score at 1" and 9"
Where to cut?

The orange triangles you show you where to but - along each of the sides to the first score mark on the long side; ie 1" cuts. I have shown the to be triangles as it makes it much easier to get a nicer finish and you don't have as much paper to make the box bulky.

With the cuts all made
Where to glue?

You want to make sure that the outside of the box is lying against your desk and then add glue to each of the tabs- do make sure you fold the tabs in, otherwise you'll be gluing them on the outside of the box and that wouldn't look too good.
How to make the box up.

I tried to colour coordinate where to affix the tabs too, but got a bit muddles on the bottom left (looking at the picture) - those marks should have been on the side panel NOT the box.
Anyway hope it makes some sense, you need to attach two tabs to the bottom sides and 1 to the top to make the lid.

I really really hope this makes some sense and apologise for the photo quality, seems that our main camera isn't working and the one I used obviously isn't up to the job!
Making a box, will hopefully now be easier and if you know how to work out the components of the box, you should be able to make boxes of varying sizes - but if you do get stuck please get in touch and I can hopefully sort it out for you!
Cheers
Sarah
Thursday, 26 November 2015
Christmas Orders

Are you thinking of ordering for Christmas? A quick reminder that Stampin' Up! have advised that to be sure to get your goodies before Christmas your orders need to be in by 13 December 2015.
So don't wait get your orders in now!
Any problems just let me know
Cheers
Sarah
Saturday, 21 November 2015
The new catalogues....
Well I know that Christmas is still to come, and I hope you have gotten all your items from the Autumn/Winter catalogue as that ends soon and lots of items are retiring so don't miss out!
But, don't worry as there is a new catalogue coming out soon. That's right I have seen it - the new Spring/Summer catalogue is out to demonstrators! Wow, some lovely items and really nice to see non-winter products - makes it feel like it is almost spring!
I can show you this...but nothing else at the moment - sorry! But if you'd like your own copy let me know and I can send you one as soon as I am allowed.

And not only that Sale-A-Bration is back! Yes that is right spend £45 (before p+p) and get to choose a free gift from a selection, and there are some wonderful items this year.

Please get in touch to get a copy of both these catalogues and don't forget it's not too late to order from the Autumn/Winter catalogue and the Annual catalogue is around for a few months still!
Happy Crafting
Sarah
But, don't worry as there is a new catalogue coming out soon. That's right I have seen it - the new Spring/Summer catalogue is out to demonstrators! Wow, some lovely items and really nice to see non-winter products - makes it feel like it is almost spring!
I can show you this...but nothing else at the moment - sorry! But if you'd like your own copy let me know and I can send you one as soon as I am allowed.

And not only that Sale-A-Bration is back! Yes that is right spend £45 (before p+p) and get to choose a free gift from a selection, and there are some wonderful items this year.
Please get in touch to get a copy of both these catalogues and don't forget it's not too late to order from the Autumn/Winter catalogue and the Annual catalogue is around for a few months still!
Happy Crafting
Sarah
Tuesday, 17 November 2015

Friday, 6 November 2015
Curvy Keepsake Box - the cutest toadstool ever!
I am still on the Curvy Keepsake box them and whilst I was making Christmas themed boxes I thought that I'd give this one a go.
 How cute is that? I have to admit not my idea as I have seen it on Pinterest (I wonder what we did before that existed?)
Anyway it is so simple to make and actually lots of fun to see it come together.

I made the base by cutting a circle out. I don't have any special dies/punches for making circles (yet!) but I do have a really cheap tool that makes one - a bit like a compass with a blade. To make the stalk I made a box with card 4.5" x 4". On the long side I scored at 1,2,3 and 4" and on the short at 1" and 3". I then cut off the small rectangle top and bottom, cut up to the score line on both the top and bottom glued it like a box and rather than one end closed, closed both ends.
It will make sense when you give it a go - or just contact me and I can do a template! I then glued the top to the box and the bottom to the circle - gave fantastic stability.
The flowers are made with the Petite Petal punch and the leaves from the Bird Builder punch. Not sure how well you can see it but the middle of the flowers have a tiny white dot - from the Owl Builder punch as are the dots on the toadstool. The butterfly is made with the Bity Butterfly punch.
For the grass around the stalk I took a green piece of cardstock and used scissors to make cuts. Stampin' Up! does have fringe scissors which would be ideal - but these are on my wishlist and regular scissors did a good job!
 It opens easily and I have filled mine with Hersey Kisses - love them and got almost half a bag in!
If you don't have all the tools to make the box would like to give it a go please get in touch as I am happy to send you all the bits and bobs to make your own for a very reasonable price!
Hope you like my little toadstool.
Happy Crafting
Sarah

Anyway it is so simple to make and actually lots of fun to see it come together.

I made the base by cutting a circle out. I don't have any special dies/punches for making circles (yet!) but I do have a really cheap tool that makes one - a bit like a compass with a blade. To make the stalk I made a box with card 4.5" x 4". On the long side I scored at 1,2,3 and 4" and on the short at 1" and 3". I then cut off the small rectangle top and bottom, cut up to the score line on both the top and bottom glued it like a box and rather than one end closed, closed both ends.
It will make sense when you give it a go - or just contact me and I can do a template! I then glued the top to the box and the bottom to the circle - gave fantastic stability.
The flowers are made with the Petite Petal punch and the leaves from the Bird Builder punch. Not sure how well you can see it but the middle of the flowers have a tiny white dot - from the Owl Builder punch as are the dots on the toadstool. The butterfly is made with the Bity Butterfly punch.
For the grass around the stalk I took a green piece of cardstock and used scissors to make cuts. Stampin' Up! does have fringe scissors which would be ideal - but these are on my wishlist and regular scissors did a good job!

If you don't have all the tools to make the box would like to give it a go please get in touch as I am happy to send you all the bits and bobs to make your own for a very reasonable price!
Hope you like my little toadstool.
Happy Crafting
Sarah
Monday, 2 November 2015
Luminere Boxes
Another Curvy Keepsake box idea. I bought vellum and some white Stazon ink ages ago but never knew that you needed special cleaner to ensure your stamps are cleaned after using Stazon. I finally got a bottle of Stazon cleaner recently and thought that I'd give these a go.

The stamp set used is the Everything Eleanor - one of my all time favourite stamp sets. I love the large swirl and have used it on lots of projects.
Initially I wasn't sure how it wold work as I hadn't used vellum or stazon before but I think it turned out lovely. The stazon ink pad comes with the refill and you put the ink on yourself and spread it with the pallet like knife provided, is really simple. The Stazon cleaner cleaned the stamp well, but it was a bit harder to clean then the usual Stampin' Up! ink but I think it was worth the effort.
I popped in an electric tealight candle. I wouldn't use a real tealight as it would go up in smoke pretty quickly! The boxes are very simple to open so you can easily turn off the candle when not needed.
I can just see these hanging on the Christmas tree and adding a touch of elegance.
Happy Crafting
Sarah
Saturday, 31 October 2015
Curvy Keepsake Box Christmas ideas
I love the curvy keepsake die and love how versatile it is. Have been preparing for a fair in a couple of weeks and thought maybe these would make a nice addition to the table.

They are so simple to make and you can get 2 boxes from one sheet of A4 if you cut them carefully. To help with the maximum use of paper I find that the magnetic platform is a real help.
Rudolph's antlers are made with the bird punch and his eyes and nose are from the owl builder both really versatile punches.
The Santa box has a strip of black about 1 cm x 6cm, I cut some off to round at the sides, buttons are from the owl builder punch and the buckle is from a non-Stampin' Up! set of dies - but you could just cut a square as well.
I would love to see your Christmas creations so please share on my Facebook page!
Happy Crafting
Sarah
www.facebook/papercraftartistry
Monday, 19 October 2015
Decorative Masks
Did you know that Stampin' UP! have lots of videos that show how to use their products. I know that we often focus on the most up to date videos but sometimes looking back you find lots of interesting stuff.
I found this video on their You Tube channel and thought I'd share it here. I love the decorative masks and as you can see you can do lots with them.

Click on the image above to see the video and sit back and enjoy.
Happy Crafting
Sarah
I found this video on their You Tube channel and thought I'd share it here. I love the decorative masks and as you can see you can do lots with them.
Click on the image above to see the video and sit back and enjoy.
Happy Crafting
Sarah
Saturday, 17 October 2015
Been a while...

Sometimes family life just takes over. I don't know if others find that, but at times I seem to have go from one day to the next not really knowing what I've achieved.
I know that you have been a bit neglected lately, but I have been crafting and now just need to write up the blog posts to match!
Keep a look out next week for a revitalised blog - and don't forget to share your creations on my Facebook page.
Have a great weekend.
Ps; don't forget you can earn even more Stampin' Rewards between 9 Oct - 9 Nov....
Tuesday, 29 September 2015
The New Chat Show
Stampin' Up! Uk have produced a series of YouTube posts where demonstrators talk about their job as a demonstrator and product information.
Click below for the first part.
If you are interested in becoming a demo, please don't hesitate to contact me.
Cheers
Sarah
Monday, 28 September 2015
Be the Star!
Sometimes you need a little bit of inspiration on a card, and that is where other Stampin' Up! demonstrators come in.

I did this card as I wanted to use the new set I had, called Be the Star - but I thought it was a bit too plain. I wasn't looking for lots of bling or sentiments or that as I did want to keep it relatively simple but it was just too simple when I looked at it.
So, I posted it on the demonstrator website I belong to (you could too if you join with me, only £99 for £130 worth of products so worth considering) and some great advise came flooding in.
The final result

Now, not much different really, but that added star in the middle (cut with the matching dies) makes all the difference I think.
Would love to know your thoughts on which one you would prefer or if you have comments on what you would have done differently that would be great too!
Happy crafting
Sarah
Sunday, 27 September 2015
Rounded Corners using envelope punch board

I often forget that you can do really simple bits to a card to give it a whole different look. Here I have rounded all the corners - and I think it makes a huge difference to a card compared to square corners.
How did I round the corners I hear you ask? With the envelope punch board of course! Not just for envelopes! The top of the board is where you can punch a rounded corner - nifty!

Here in the not so focused picture (sorry, need to get better at photo taking) you can see the faintly stamped honey comb from the Butterfly Basic set, and I thought it nicely tied in with the black and white background paper which is from the Pretty Petals DSP stack - a great value pack.

The flowers are from the Wild About Flowers stamp set. I am loving that set at the moment and finding it extremely versatile.

Happy crafting.
Sarah
Friday, 25 September 2015
Fun Fold card..

I love fun fold cards! They are not only fun to make but also fun to give....always nice to give something a little different.
This fold was cased from Dawn Olchefske, she has great videos and they are so easy to follow. It also uses Designer Series Paper for the main card base - something that I've not done often.
I do often try different folds out first on printer paper or paper I'm not too fond of, mainly because sometimes they can be a little tricky and I really don't like wasting beautiful paper. This fold however, wasn't tricky and was very easy and simple to make.

I love the matching flower punch and stamp set - and it comes in a bundle which saves you pennies (Flower Shop bundle). The solid green background behind the flower uses the Decorative Label punch - a very versatile punch.

I often forget about this punch, the Cupcake Builder Punch, and I'm not too sure why, because goodness it's cute! The candles inside the card are also punched from the same punch, so a great punch to have! I've used the top of the cupcake for clouds, popcorn and even tree tops! So much you can do.
The solid green behind the cupcake if a square piece, with the corners rounded using the top of the envelope punch board - something else I forget to use a lot! Makes a nice change from square corners. And for that touch of elegance, don't forget the gold thread! and the rhinestones!
Both cards were made with paper is from a retired paper stack - check out this years though because they are even prettier!

I love the smaller card, is a 3 x 3 card and great to have on hand, and I'll be making a few of these to have on hand for Christmas.
Once again this was made with retired paper, but the new Autumn/winter catalogue has some beautiful papers as does the annual catalogue - so don't forget to check them out.

The sentiment is also from a retired set, but check out the new catalogue for lots more fun ones. The oval punch and scalloped oval made a great addition to your punch collection, and so easy to use.
I loved these cards and found them lots of fun to make. I hope you do to.
Any queries please don't hesitate to contact me.
Happy Crafting
Sarah
Wednesday, 23 September 2015
Dinosaurs....rawr
If you love dinosaurs then this set is for you. The set is called No Bones About It and as a photopolymer set is so simple to use.

I love all the dinosaurs in the set and wow what a quick and simple way to make a birthday card.
Kids and adults alike will love it!
A quick post today, but it really is a quick and simple card to make.
Happy Crafting
Sarah

I love all the dinosaurs in the set and wow what a quick and simple way to make a birthday card.
 |
| Don't forget the footprints! |
Kids and adults alike will love it!
A quick post today, but it really is a quick and simple card to make.
Happy Crafting
Sarah
Sunday, 20 September 2015
Wild About Flowers tone on tone
Using the same colour card and ink gives a lovely effect, and also you don't have to really think about it- which is always nice sometimes.
These cards were quick and simple to make using a new incolour, Tip Top Taupe.
The main picture uses a very easy stamp set to use, Wild About Flowers, and as a two-step stamp set, really easy to line up the stems and flower heads. The honey comb background comes from the Butterfly Basics set and just adds a little something I think.

The colour additions come from blackberry bliss and a new incolour watermelon wonder, as well as the delightful gold thread. I love that and have just ordered the same in silver!

The card size is 3 x 3 and a lovely size to give as little thank you cards. The banners are made with the Triple banner punch, and that is so quick and simple to use, as are the matching butterfly stamps and punches.
One thing I love about Stampin' Up! is the matching stamps and punches- makes life so easy.
Happy crafting
Sarah
Thursday, 17 September 2015
A new addition to the family - The Fine Tip Glue pen
Stampin' Up! have a fantastic range of adhesives; from wet glue through to fast fuse. My favourite has to be Tombow or the green lidded glue. This is one of Stampin' Up!s wet glues and it is amazing. Gives you enough time to wiggle objects or pages about is you need to, but one stuck they are stuck!
I often buy cheaper glues, mainly because I often run out of Stampin' Up ones! However everytime I do it, I am disappointed. They seem to work fine at first, but after a few days I realise that my cards look a bit different, and then I realise something has dropped off or moved!
Well, in the new Autumn/Winter catalogue Stampin' Up! have added a new addition to the family- the fine tip glue pen!
Here's a little video from Stampin' Up! to show you how it works.

Isn't that amazing. It works wonderfully on those smaller items and with the needle in the lid it doesn't close up!
What adhesives do you like to use?
To purchase any of the Stampin' Up! adhesives just follow the links to my shop and you will even see a section just for adhesives - it is that easy.
Any queries just get in touch!
Sarah
I often buy cheaper glues, mainly because I often run out of Stampin' Up ones! However everytime I do it, I am disappointed. They seem to work fine at first, but after a few days I realise that my cards look a bit different, and then I realise something has dropped off or moved!
Well, in the new Autumn/Winter catalogue Stampin' Up! have added a new addition to the family- the fine tip glue pen!
Here's a little video from Stampin' Up! to show you how it works.
Isn't that amazing. It works wonderfully on those smaller items and with the needle in the lid it doesn't close up!
What adhesives do you like to use?
To purchase any of the Stampin' Up! adhesives just follow the links to my shop and you will even see a section just for adhesives - it is that easy.
Any queries just get in touch!
Sarah
Wednesday, 16 September 2015
Jingle All the Way Bundle - video
I love this set! I think that it makes really elegant cards and wow, so simple but effective.
Check out another Stampin' Up! video showcasing this wonderful set.
Happy Watching!
Sarah
Here's the bundle link for both the wood and clear stamp sets + dies
Check out another Stampin' Up! video showcasing this wonderful set.

Happy Watching!
Sarah
Here's the bundle link for both the wood and clear stamp sets + dies
Monday, 14 September 2015
Parties or Classes....
Would you rather a free party to learn about Stapmin' Up! or a class in your own home - which would suit you best?

Parties
You have probably heard of Avon Parties or even Tupperware Parties but did you know that you can also have a Stampin' Up! Party?
What other way then to get a group of friends together and have a party to learn all about the wonderful products that Stampin' Up! have as well as making a creation of your own...I know I'd like to go to one!
If you live within the Reading area or close surrounds contact me to arrange for a party in your own home - you provide the friends (and perhaps a refreshment for your guests) and I provide all the crafting supplies.
As the host if you get sufficient sales you will be able to choose free items up to a certain value. The value depends on how much you sell.
Parties cost you nothing, except those refreshments of course! So get a group of friends together and contact me today.
Classes
If you would rather have a class with your friends in your own home, I too am happy to provide this.
Normally this would be a 2 hour class making 2 cards and 1 3D project for a cost of £10 per person, minimum of 4 people.
I will provide all the materials for you and your other classmates, you just need to provide the venue, classmates and perhaps a light refreshment.
What better way to extend your papercrafting skills than having a class in the comfort of your own home?
Get in touch to book a class before the Christmas rush!

Happy Crafting
Sarah
Sunday, 13 September 2015
To You and Yours Shaker Cards
Did you know that Stampin' Up! have videos on Youtube. This is a great place to visually see how to do techniques and to also see the great products that they have.
Check out this video on the Shaker Card kit...let me know what you think! Just click on the picture below.
Happy watching, and if you like to order the kit click on the picture below.
Check out this video on the Shaker Card kit...let me know what you think! Just click on the picture below.
Happy watching, and if you like to order the kit click on the picture below.
Wednesday, 9 September 2015
Autumnal Colours

I participate in a monthly challenge and this weekends challenge was to create a card using autumnal colours - what do you think?
I love the fact that you can colour stamps using the Stampin' Markers - makes the stamp extremely versatile. Here I used the leaves from the Perpetual Birthday stamp set and coloured individual leaves different colours and then just stamped after remembering to "huff" before stamping.
I also love the gold metallic thread on the top, a little bit of shine. The picture doesn't really do it justice sorry.
A quick sentiment with the ends cut out using the triple banner punch and then raised on dimensionals and there you have it - a quick simple autumnal card.
Happy Crafting
Sarah
Thursday, 3 September 2015
A simple birthday card

Sometimes I like to make and quick and simple card, and I think this one fits the bill. It was really simple to make, especially with the new triple banner punch. No more trying to cut fish tails evenly the punch does it all for you. It even does a lot more than the 3 sizes indicated in the catalogue.
I also love the new Mint macaron colour, especially against the very vanilla card stock. The pretty paper is from the Pretty Petals Designer series pack, a great little pack of paper and very reasonably priced.
I finished off with a Happy Birthday sentiment, which was highlighted around the edges by using a sponge.

To finish it off a bit of bling was added at the bottom of each banner. Stampin' Up! rhinestones are great and even better they are currently on the Weekly Deals..so a bargain to be had!
Hope you like this quick and easy card and you can see the main supplies used below. Any questions please just ask.
Happy Crafting
Sarah
Subscribe to:
Posts (Atom)